cam software Welcome to the real world, NC Program!
By Konrad Mocke
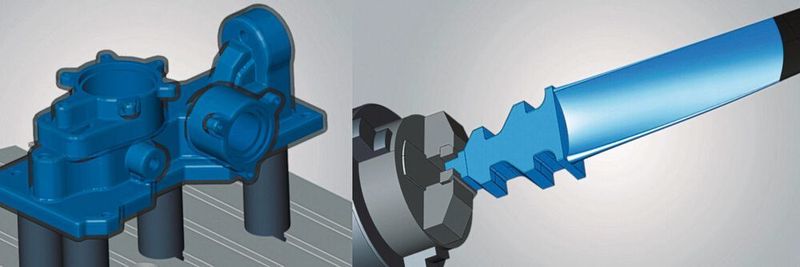
The Hypermill Best Fit function further speeds up and simplifies the reworking of manufactured workpieces. The NC code is automatically adapted to the exact position of the installed milling workpieces (zero point) using the CAM functions.
company in this topic

(Build: Open Mind)
The supporting structures and surfaces, which can be seen in layers, are the reason why additively produced components must be reformulated. That’s why there are also hybrid machining centers that perform 3D printing and machining post-processing in a single setup. If you are using a CAM system that supports both processes, the work piece model in the CAD/CAM and the reality in the machine are identical at all times. These hybrid machines only make economic sense for a small number of pavers.
Additive and subtractive manufacturing is usually done on different machines, because you are generally more flexible in customizing manufacturing capabilities. However, this also means that you must ensure that the component produced is put into direct energy deposition (DED) or in wire-arc additive manufacturing (WAAM) in the milling machine for post-processing so that the zero point and axes to the NC-Code match.
In conventional machines, too, there is a change in machining or the need to align the space with a small allowance. Termination after heat treatment of the rough workpiece, reworking of the repaired workpiece, forming of cast parts or forged blanks – in all such cases, an object must be aligned on a machine so that the tool in the machine treats the component as programmed. In addition, manual component alignment is often error-prone, inaccurate, and time-consuming.
Manual alignment: a time consuming process
Manual alignment requires experience, patience and time. Often several levels and thus also axes must be considered at the same time. And here we are again with the 3D printing post-processing example – some of the steps involved are pretty small. One of the great advantages of the powder coat process is that you can manufacture workpieces that cannot be produced by any other process, right up to electronic devices that simulate implanted structures. In order to completely finish and not destroy ultra-compact structures, the zero point and position of the workpiece must be known to an accuracy of a few hundred millimeters after clamping.
Manual alignment takes several hours in practice and presents one of the biggest productivity hurdles, since component alignment with dial gauge, control cycles and a lot of sensitivity. To some extent, you can adapt the real installation to the virtual world of programming. This time-consuming process often has to be repeated many times and is fraught with uncertainty and risk. Moreover, since these are components that already correspond to the desired end products, with the exception of small protrusions. Sometimes you can achieve your goal more easily with complex stabilization devices, but in the end only the effort turns out. It is frustrating that with manual alignment there is always a residual risk of damaging an expensive vacuum.
The elegant alternative to manual alignment
With the Best Fit functionality, Open Mind has provided an alternative to manual alignment of workpieces for further processing in the virtual machine of their CAD/CAM suite of Hypermill. This software function automatically aligns the component with the push of a button. The prerequisite is a five-axis milling center with a digital measuring probe and a willingness to open the machine to communicate with the digital twin. With 3D measurement, the unaligned component is touched on the device and the measurement protocol is sent to the CAM system. The program adapts the NC code to the position of the real component. Thus the virtual world (programming) now adapts to the real world (installation) – not the other way around!

In practice, the process is as follows: first, you have to create measurement tasks in the CAM software so that the system can obtain information about real conditions. When adjusting the measurement points, the software supports the user by simulating a real vacuum displacement compared to the digital twin. This locates the focal points. The debugged NC code is generated based on the measurement protocol and then simulated in the virtual machine in the actual installation state and optimized automatically. This is very important. The Hypermill Best Fit function generates tool paths that are one hundred percent collision verified, because in the simulation variable paths and compensation paths are checked in relation to machine limitations. The original NC code has been checked, but an inaccurate installation means that a new collision condition must be assumed. The last step before allowing the tool to create chips is to check the modified NC code again by repeated keys. In this way, the virtual world is compared to reality again. If all the raw parts are installed in the same way in serial production, this last verification step is sufficient to ensure that all components are installed correctly.
Conclusion: Setup Processes Got Shorter
Automatic alignment saves time, nerves and in some cases a lot of money if manual alignment proves to be unreliable enough. With the Hypermill Best Fit function, factory ready operations are shorter and easier to plan. Users also become more flexible, since changing the machine in the short term is no longer intimidating. Will there be more post-processing for 3D printing in the future? You are well prepared with a CAM job that adapts the NC program to reality.
This article first appeared on our partner portal www.maschinenmarkt.ch
(No.: 47832091)

“Certified gamer. Problem solver. Internet enthusiast. Twitter scholar. Infuriatingly humble alcohol geek. Tv guru.”


