

When it comes to data backup, there are two schools: those who swear by the cloud, and the boldest who prefer good old backups created on physical media. If the process of backing up iPhone content to the cloud becomes trivial, because it is almost entirely automated, then create a file Support Device data on a PC or Mac requires several actions on your part.
The process, which was completely normal, has evolved, and creating an iPhone backup on a PC or Mac is an exercise you may not be familiar with anymore.
If you are using a Windows PC, the process will remain as it was a few years ago as you will have to go through iTunes, Apple’s multimedia player which is also used to sync data on iPhone, iPad and other iPods.
However, on Macs, the process may differ depending on your version of macOS: in Catalina, Big Sur and Monterey, everything happens directly in the Finder, while in macOS Mojave and earlier, you will have to solve using iTunes.
Here is everything you need to know to save your iPhone content locally on your computer.
Also to discover the video:
on the windows
1. Download and install iTunes
To backup your iPhone to your Windows PC, you will absolutely need to download iTunes. Apple’s media player is also used to manage, sync, and backup iPhone, iPad, and iPod data.
You can download and install it directly from a file Microsoft Store Or download iTunes as an executable file to install it manually on your Windows system.

2. Connect your iPhone to PC
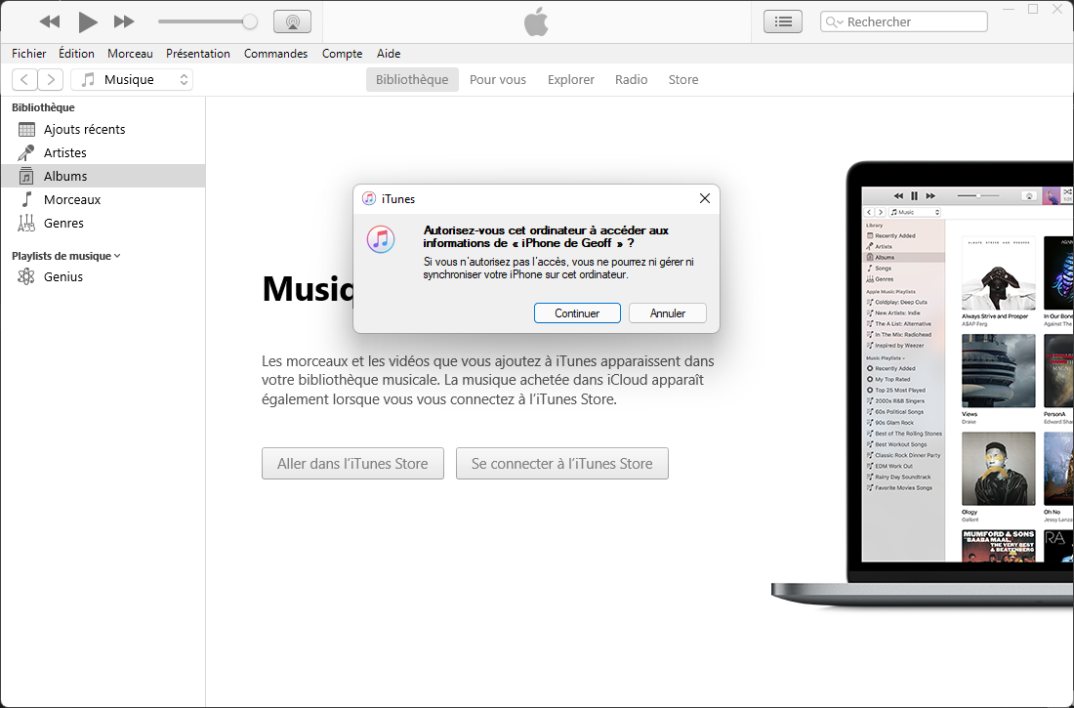
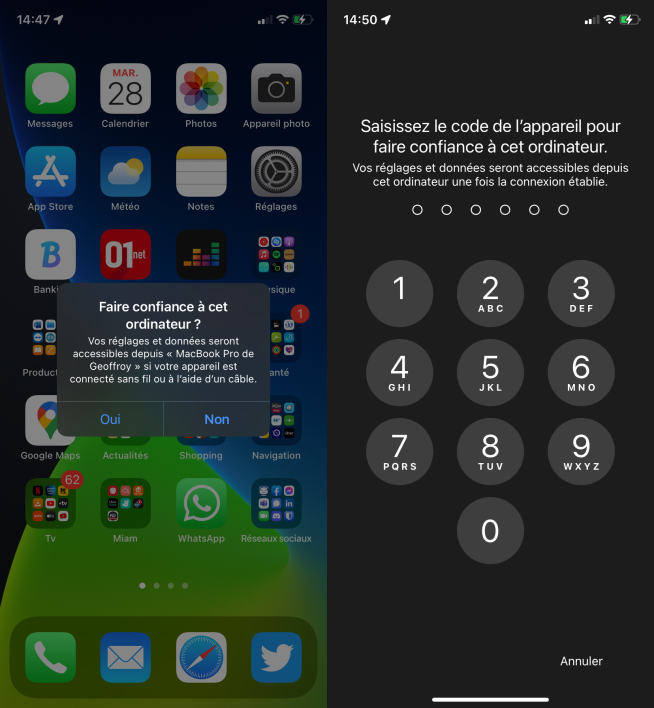
Using a Lightning cable, connect your iPhone to your computer and launch iTunes. I accept the permission Trust this computer by choosing Yes on your iPhone, then type in your unlock code.

Click on Continue on iTunes on your computer to allow the computer to access your iPhone information.
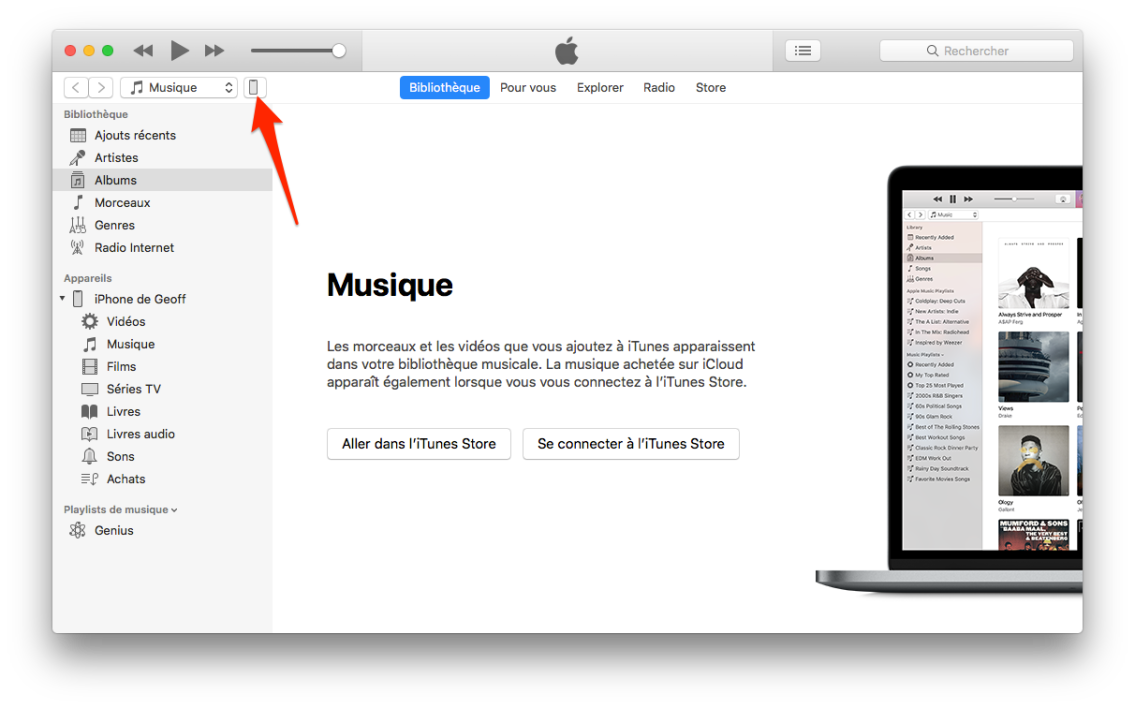
3. Start Backup
In iTunes, click the button that holds a file Iphone Top left next to the dropdown menu Music.

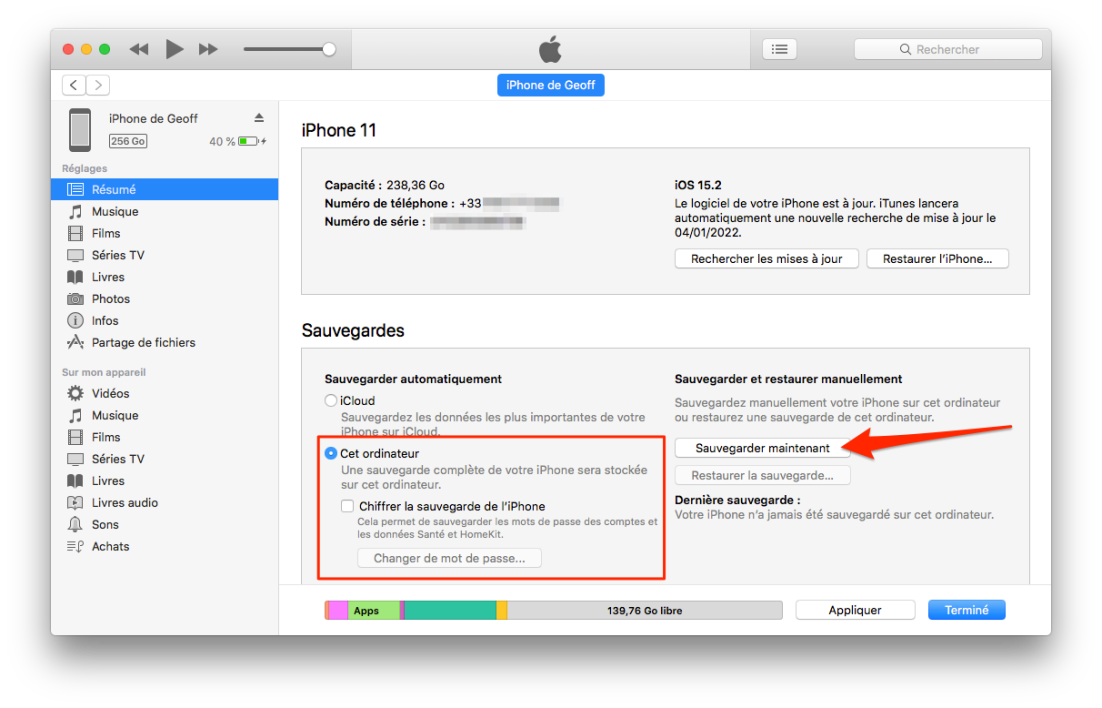
You are now on your iPhone’s management page. In the department Support, Determine this computer Then press the . button save now. iTunes should then start the process of backing up your iPhone to your computer.

Note that you will first need to check the box Encrypt local backup And create a password if you want to be able to include your health and activity data stored on your iPhone (and Apple Watch) in the backup.
Be patient with your problems, the process can take several tens of minutes depending on the amount of data stored on your device. Once the backup is complete, iTunes will automatically display the date and time of the backup under File last save.
On macOS Catalina, Big Sur and Monterey
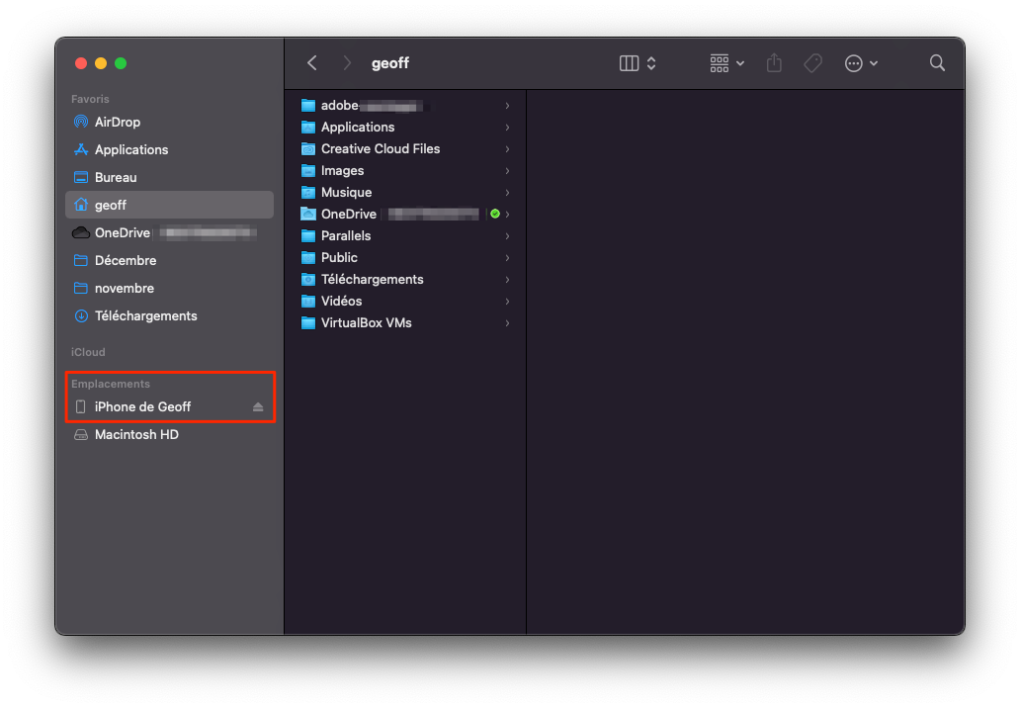
1. Open a Finder window
If you have a Mac with macOS Catalina or later, backing up your iPhone is done directly from a file discoverer.
Connect your iPhone to your Mac with a Lightning cable and open a window discoverer. In the left column, in the section stadiums, select your Iphone.
2. Start iPhone Backup
If you plan to include health and activity data stored on your iPhone (and Apple Watch) in your backup, check the box Encrypt local backup and create a password.
Then select the option Backup all your iPhone data on this Mac, then click the . button save now.
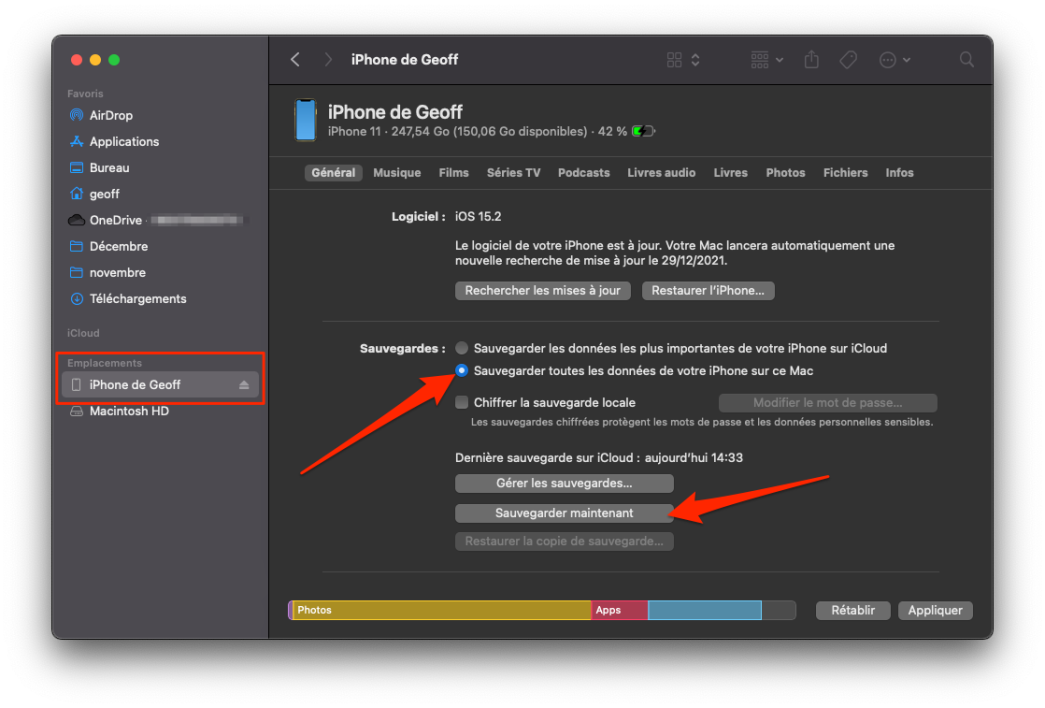
Now be patient because the backup process can take several tens of minutes depending on the amount of data stored on your iPhone. When the backup is complete, remind The last backup on this Mac followed by the date and time of the backup should be indicated.
On macOS Mojave and earlier
1. Connect your iPhone and open iTunes
First, launch iTunes and connect your iPhone to your Mac using a Lightning cable.
Your iPhone may display a popup Trust this computer. If so, select Yes Then type in your unlock code.
Similarly on your Mac, you may need to click Continue on iTunes To allow the device to access your iPhone information.
2. Go to the iPhone admin panel
At the top left of the iTunes window, click the button with the extension Iphone, right next to the dropdown menu Music. Now you are faced with a window to manage sync and backup of your iPhone.
3. Start Backup
If you want to include health and activity data stored on your iPhone (and Apple Watch) in your backup, check the box iPhone Backup Encryption and create a password.
Then select the option this computer, then click the . button save now To start backing up your iPhone content.
Go for a coffee while the backup is in progress, the process can take several tens of minutes depending on the amount of data to be backed up. Once the backup is complete, online last save It should display the date and time of the backup you just created.
Now that your iPhone is backed up locally on your computer, you can restore all of its data to a new device, or to your current iPhone if you just reset it. The procedure for restoring a backup is similar to the procedure for creating a backup. The only difference, you will have to click the button Restore the backup To load all the data saved on your new device.

Sylvia Plath is a contributor at TechNewsInc, covering news, politics, business, technology, sports, entertainment, and lifestyle. She focuses on delivering clear, accurate reporting and useful information on current affairs, helping readers stay informed through relevant stories, emerging trends, and developments that matter to a broad audience.


")